
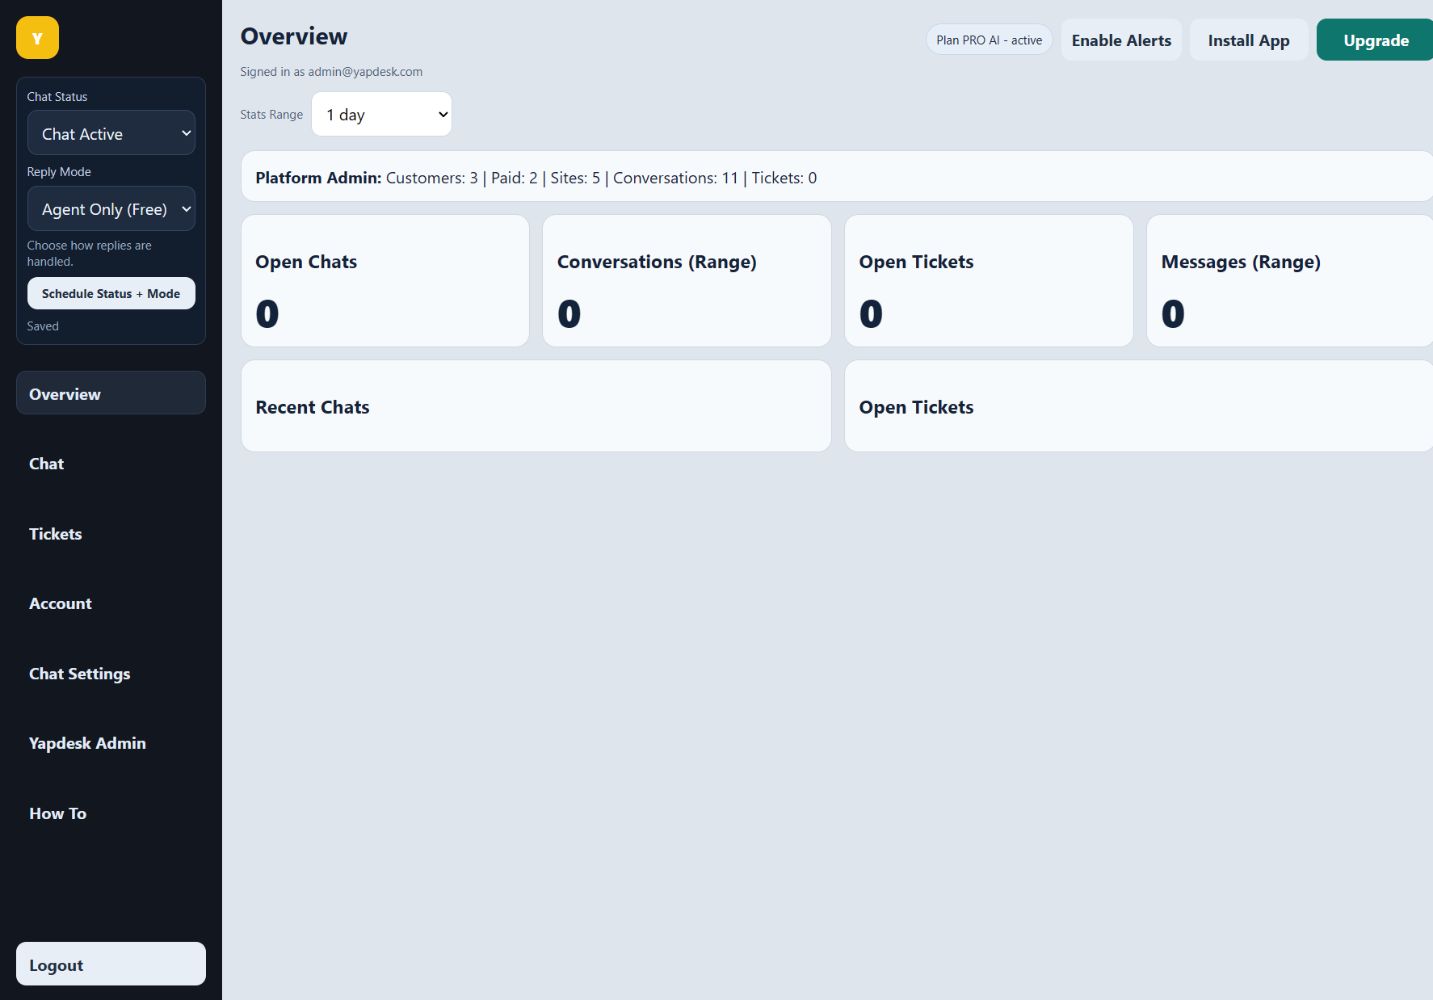
Set Chat Status to Chat Active
Open the Yapdesk dashboard. In the left status controls, choose Chat Active. Leave Reply Mode on Agent Only when a person will answer. The Free plan includes this live-chat workflow.
Enable alerts on the answering device
Select Enable Alerts in the dashboard and allow browser notifications when prompted. Keep the dashboard installed or open on the phone or computer that should receive new-chat alerts.
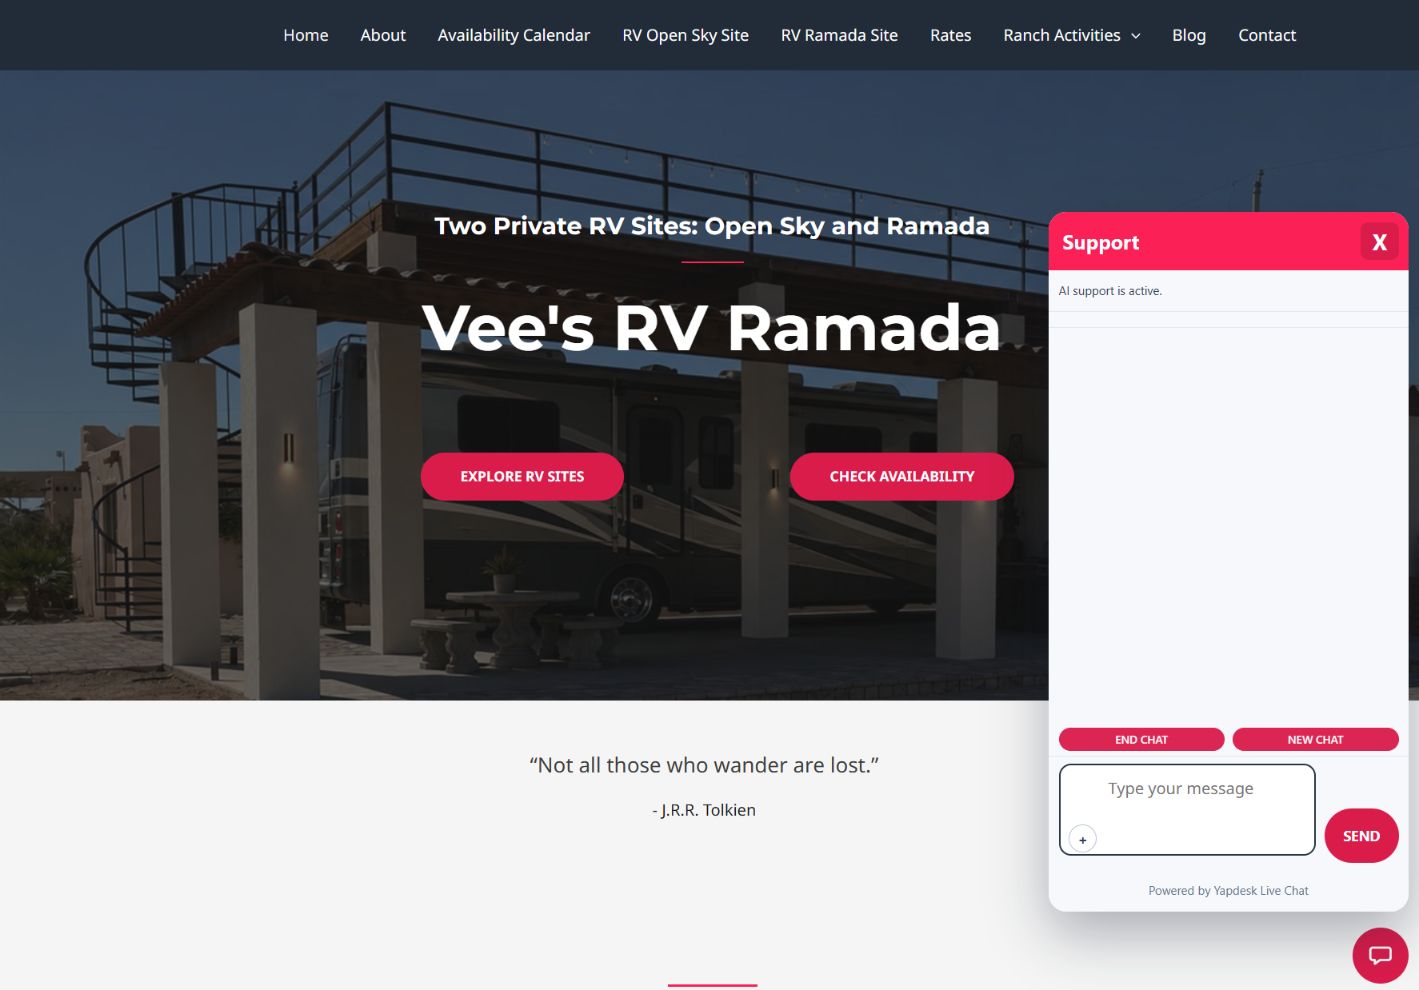
Send a test from the website
Open your website in a private window or on a second device. Open the support widget, type a clearly marked test message, and select Send. Do not test while signed into a cached admin preview because it may not match a normal visitor session.
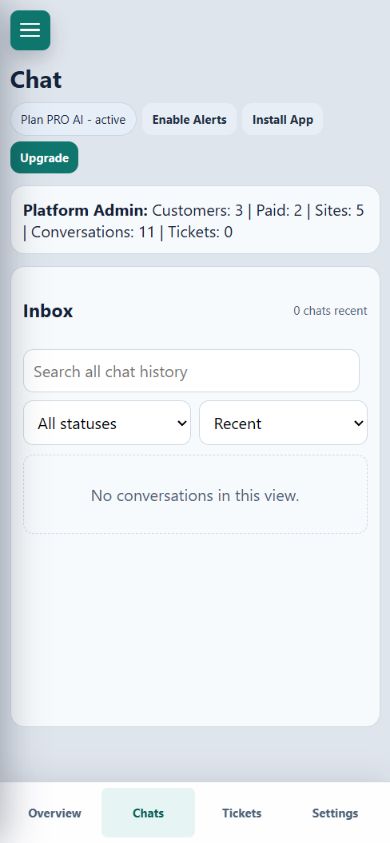
Open Chat and choose the conversation
In Yapdesk, open Chat. New conversations appear in the Inbox list. On a phone, Chats is in the bottom navigation. Select the visitor to open the conversation thread.
Reply and finish the chat
Type your response and send it. When the conversation is complete, close the chat so the inbox reflects what still needs attention. If the customer needs an email follow-up, convert the conversation to a ticket instead of leaving it open.